Go on not so small hardware
This article was updated on 2024-08-09
Introduction
The title of this article refers to my earlier article: Go on very small hardware, where I described the Emgo, Go-like language based on Go to C translation. Now I want to introduce the logical next step: the port of the Go reference compiler (gc) to the not so small microcontrollers. What does “not so small” mean will turn out later in this article.
Over the past dozen months I was concurrently involved in several hobby projects. One of them was an attempt to add support for ARMv7-M instruction set to the Go compiler, with the vague hope that the next step will be slimming down the Go runtime to the size suitable for microcontrollers.
I spent a couple of months exploring the internals of the Go assembler, linker and compiler. The result was a preliminary port for the linux/thumb pair where thumb means the Thumb2 instruction set. This is the only instruction set included in the ARMv7-M ISA. After fixing most of the bugs in the linux/thumb port I’ve started working on the noos/thumb, the port that will be able to generate code for bare-metal ARM microcontrollers (Cortex-M3, M4, M7, etc. without any OS on the board).
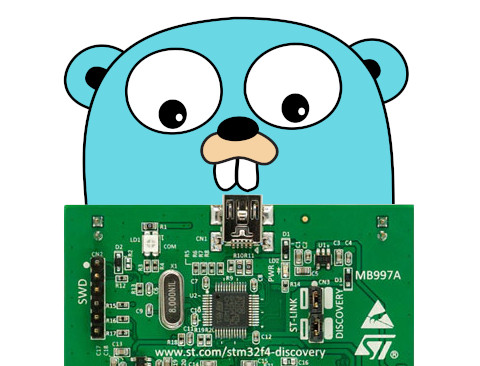
The whole fascinating history of the both stages is worth another article. Here, I will just give you simple step by step recipe on how to compile and run your first Go program on the ARM microcontroller, in particular on the STM32F407 which is the heart of the popular STM32F4-Discovery kit.
Preparing the environment
The programming environment will be based on the original Go compiler patched for the noos/thumb target and on a set of scripts and libraries from github.com/embeddedgo.
See Getting started for the most recent description how to install Embedded Go from binary releases. The following paragraphs describe instalation from source.
Installing Go from source
If you’ve never built the Go compiler from source then don’t worry because it is an easy and fast process. Compilation of the whole Go together with the standard libraries takes less than 2 minutes on my desktop PC. This is incomparably faster than compiling GCC or LLVM which can take from about 30 minutes to a few hours depending on the speed of your computer.
The whole procedure of instaling Go from source is fully described here. In the following parts of this article I assume that you’ve managed to follow the instruction and your newly built Go toolchain is now located in $HOME/goroot.
Downloading the necessary components of embeddedgo
For the following steps we will need:
- a patch that adds the noos/thumb target to the Go,
- several scripts that help to build, load and debug embedded programs,
- a library that supports our test microcontroller.
Let’s download all of them:
mkdir $HOME/embeddedgo
cd $HOME/embeddedgo
git clone https://github.com/embeddedgo/patch.git
git clone https://github.com/embeddedgo/scripts.git
git clone https://github.com/embeddedgo/tools.git
git clone https://github.com/embeddedgo/stm32.git
Adding support for noos/thumb to the Go compiler
The following commands will add the noos/thumb target to your Go compiler:
cd $HOME/goroot
git checkout go1.22.5
patch -p1 < $HOME/embeddedgo/patch/go1.22.5
cd src
./make.bash
Now you have a ready to use go1.22.5 with added support for linux/thumb, noos/thumb and noos/riscv64 GOOS/GOARCH pairs. You can run tests for your native architecture to ensure that nothing was broken:
./run.bash --no-rebuild
Do not forget to add $HOME/goroot/bin to your PATH environment variable to allow use go command without specifi a full path to it.
If you already have any version of Go installed then you will have a problem which one will be used when you type go. The Getting started describes how to compile Embedded Go and setup an enviroment that do not interfere with existing Go instalation.
You can always revert all changes and return back to the clean go1.22.5 using the following commands:
git reset --hard
git clean -fd
Embedded Go has its own build tool called emgo. It’s a thin wrapper over go command. Let’s install it into $GOPATH/bin or $HOME/go/bin if the GOPATH isn’t set:
cd $HOME/tools/emgo
go install
Make sure that $GOPATH/bin or $HOME/go/bin is also added to your PATH environment variable.
Building an running the example program
The embeddedgo/stm32/devboard directory contains example programs for several development boards. In the following steps we’ll use the blinky example for the STM32F4-Discovery kit.
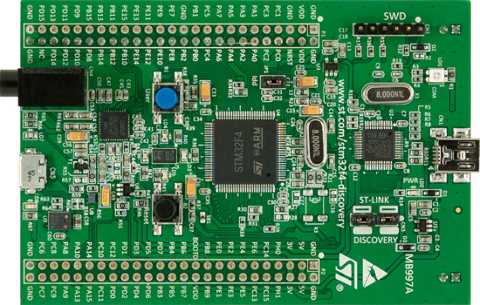
As every devboard from ST the F4-Discovery includes ST-LINK programmer so you can simply connect its mini-USB port to a free USB port in your PC.
The hardware part of the programmer is done but we still neeed to handle the software part. You need to install OpenOCD or Texane’s stlink and in case of Linux add some udev rules.
It is also advisable (required for Texane’s stlink) to install binary utilities with support for ARM Thumb2 instruction set:
apt install binutils-multiarch
Building the example program
The blinky example blinks all LEDs on the board with speed dependent on the button state:
func delay() {
	if buttons.User.Read() != 0 {
		time.Sleep(time.Second / 8)
	} else {
		time.Sleep(time.Second / 2)
	}
}

func main() {
	for {
		leds.Green.SetOff()
		leds.Orange.SetOn()
		delay()

		leds.Orange.SetOff()
		leds.Red.SetOn()
		delay()

		leds.Red.SetOff()
		leds.Blue.SetOn()
		delay()

		leds.Blue.SetOff()
		leds.Green.SetOn()
		delay()
	}
}
Building is easy:
cd $HOME/embeddedgo/stm32/devboard/f4-discovery/examples/blinky
emgo build
As a result you get a blinky.elf binary.
The emgo build is a smart wrapper over the go build command. You can use go build directly this way:
export GOOS=noos
export GOARCH=thumb

GOTARGET=stm32f407
GOTEXT=0x8000000
GOMEM=0x20000000:128K,0x10000000:64K

go build -tags $GOTARGET -ldflags "-M $GOMEM -T $GOTEXT" -o blinky.elf
The emgo tool does some more for interrupt handling code and othe things but this is a topic for another article.
Running blinky.elf on bare-metal MCU
If you have the nevest version of a F4-Discovery which is equipped with ST-LINK/V2-A programmer you can simply copy ELF file to the provided FAT filesystem:
mount /dev/stlinkv2-A_ /mnt/stlink
cp blinky.elf /mnt/stlink
sync
If you have an older version you can program it with Texane’s stlink
../load-stlink.sh
or with OpenOCD:
As you’ve probably noticed, loading takes some time. The ST-LINK isn’t the fastest programmer under the sun but let’s see what really causes such slow programming:
$ size blinky.elf
   text	   data	    bss	    dec	    hex	filename
 567244	   2560	  11024	 580828	  8dcdc	blinky.elf
Now we can tell what not so small means, at least when it comes to Flash. As you can see the smallest MCU you can consider should have 640 KB of Flash (our Discovery board has 1 MB).
Let’s compare this with a similar Emgo program:
$ size cortexm4f.elf
   text    data     bss     dec     hex filename
  10776     180     180   11136    2b80 cortexm4f.elf
The difference is significant. Let’s see what eats our Flash:
$ nm -S --size-sort blinky.elf |tail
08012028 000006b8 T runtime.(*mspan).sweep
0803196c 0000074c T internal/reflectlite.haveIdenticalUnderlyingType
080560e8 0000075c r runtime.typelink
08022838 00000808 T runtime.newstack
0801d88c 0000083c T runtime.schedtrace
080295ac 00000854 T runtime.typesEqual
0800c114 00000b24 T runtime.gcMarkTermination
200020b0 00000c08 B runtime.mheap_
080266ec 00000f90 T runtime.gentraceback
08056858 0003412a r runtime.pclntab
The biggest one is the pclntab: 208 KB. Others visible here (with T or r flag) togheter consume just 18 KB.
What about RAM? The BSS and DATA segments together take 13 KB but majority of memory in Go is allocated dynamically. We need to see the allocator statistics but that’s for another article.
At the end, let’s make a little modification of our program:
func main() {
	for {
		leds.Green.SetOff()
		leds.Orange.SetOn()
		println("orange")
		delay()

		leds.Orange.SetOff()
		leds.Red.SetOn()
		println("red")
		delay()

		leds.Red.SetOff()
		leds.Blue.SetOn()
		println("blue")
		delay()

		leds.Blue.SetOff()
		leds.Green.SetOn()
		println("green")
		delay()
	}
}
and run it:
As you can see, OpenOCD allows you to see debug messages and I don’t have to convince anyone that it’s a very useful feature. You need to install itmsplit to see anything.
How complete is this port?
The compiler, assembler, disassembler, linker and runtime are all usable but still not tested too much. There is no support for FPU but should be quite easy to do. The compiler recognizes three GOARM values: 7: soft-float (default), 7F, 7D: reserved for two floating-point modes.
There is a //go:interrupthandler pragma that allows to write interrupt handlers in Go. This pragma and an rtos.Note type allows to write interrupt driven drivers for built-in peripherals. The programming environment seems to be ready but bugs can be anywhere :)
Some tests for linux/thumb still fail. They are all related to trecebacks and the problem lies in the fact that in Thumb mode the function address in memory differs from its call addres (the LSBit in the call addres is set). I fixed many such tests but few of them are still unhandled.
The os package is not ported yet. We have GOOS set to noos and I’m still not sure how to approach this. This is rather philosophical (less technical) problem and requires some reflection. We probably need something like a virtual file system but the case remains open.
All packages that require the os package (directly or indirectly) will not
work. In particular this applies to the time package. There is a port of time
package from Emgo which you
can use in place of the original one.
Update 2020-12-18: The os and rtos packages implement a virtual file system. You can mount different file sytems using rtos.Mount method and use all functions from os package (see github.com/embeddedgo/fs for example filesystems)
Update 2021-02-24: The generation of floating-point instructions is supported but only if the FPU supports both 32-bit and 64-bit operations (Kendryte K210, STM32H7). Use soft-float mode if the FPU supports only 32-bit instructions (STM32F4, STM32L4)’.
Michał Derkacz