pix, a minimalistic graphic library (part 1)
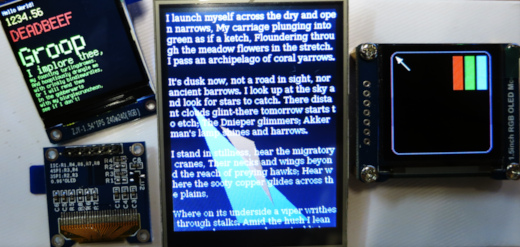
Pix occupies the same niche as the Adafruit GFX library, ucglib or u8g2 but may also be used outside the microcontroller world. As it was created much later and written in Go it can be much simpler, concise and clean without sacrificing essential features. The main design principles were simplicity, portability and speed, hence the small number of graphics functions and the lack of features that require significant hardware support to make them work fast. See also the previous article about the library targeted more capable displays.
Pix provides only 9 drawing functions. Three basic ones:
func (a *Area) Draw(r image.Rectangle, src image.Image, sp image.Point, mask image.Image, mp image.Point, op draw.Op)
func (a *Area) Fill(r image.Rectangle)
func (a *Area) NewTextWriter(f font.Face) *TextWriter
and six implemented using the above Fill function:
func (a *Area) Point(x, y int)
func (a *Area) Line(p0, p1 image.Point)
func (a *Area) RoundRect(p0, p1 image.Point, ra, rb int, fill bool)
func (a *Area) Quad(p0, p1, p2, p3 image.Point, fill bool)
func (a *Area) FillQuad(p0, p1, p2, p3 image.Point)
func (a *Area) Arc(p image.Point, mina, minb, maxa, maxb int, th0, th1 int32, fill bool)
With some additional properties of the Area type this small set of drawing primitives allows you to easily present various kinds of data in many different ways and even create a simple user interface.
Basic functions
You can do surprisingly a lot with just three basic functions mentioned above. In fact, you may throw Fill out of this set reducing it to just two functions. Fill can be easily implemented using Draw so it’s not that basic. On the other hand Fill is simpler to use and often much more efficient than Draw so let’s let it stay in the basic set.
To show how it all works closer to practice let’s create an example view of a simple music player. To begin with, let’s see what can be done using just these three basic functions.
Display
Eventually everything we draw will go to the display so we need a display.
disp := pix.NewDisplay(driver)
But what’s a driver? Driver can by anything that implements the pix.Driver interface:
type Driver interface {
	Draw(r image.Rectangle, src image.Image, sp image.Point, mask image.Image, mp image.Point, op draw.Op)
	Fill(r image.Rectangle)
	SetColor(c color.Color)
	SetDir(dir int) image.Rectangle
	Flush()
	Err(clear bool) error
}
Most cheap display controllers provide just such an interface:
-
writing to (and sometimes reading from) a specified rectangular area of the frame memory (
Draw,Fill), -
some also let you set the display orientation (
SetDir).
The remaining three methods are related to the internal operation of the driver.
However, we won’t be working with any real display for now. All we need is a driver that simulates the display in a file. Let’s write one. It’s easy.
type Driver struct {
	Name  string
	Image draw.Image
	fill  image.Uniform
	err   error
}

func (d *Driver) Draw(r image.Rectangle, src image.Image, sp image.Point, mask image.Image, mp image.Point, op draw.Op) {
	draw.DrawMask(d.Image, r, src, sp, mask, mp, op)
}

func (d *Driver) SetColor(c color.Color) {
	r, g, b, a := c.RGBA()
	d.fill.C = color.RGBA64{uint16(r), uint16(g), uint16(b), uint16(a)}
}

func (d *Driver) Fill(r image.Rectangle) {
	d.Draw(r, &d.fill, image.Point{}, nil, image.Point{}, draw.Over)
}

func (d *Driver) SetDir(dir int) image.Rectangle {
	return d.Image.Bounds()
}

func (d *Driver) Flush() {
	if d.err != nil {
		return
	}
	f, err := os.Create(d.Name)
	if err != nil {
		d.err = err
		return
	}
	d.err = jpeg.Encode(f, d.Image, &jpeg.Options{90})
	f.Close()
}

func (d *Driver) Err(clear bool) error {
	err := d.err
	if clear {
		d.err = nil
	}
	return err
}
The driver is ready. A few details, however, require clarification.
Driver is almost simplest possible implementation of pix.Driver. As you can see everything is drawn using the standard draw.DrawMask function.
-
Imageserves as a temporary framebuffer. -
Nameis the name of the file where theFlushmethod will save the content of the temporary framebuffer. This file can be thought of as a target framebuffer whose content is visible to the user. -
Drawis just a straightforward wrapper overdraw.DrawMask. -
SetColorsets the color of the uniform image used byFill. -
Fillsimply draws filled rectangles using theDrawmethod. There is no any optimization here. Well, maybe avoiding allocating newimage.Uniformevery call is some sort of optimization. -
SetDiris intended for display rotations but it’s fine for the driver to completely ignore the changes of display direction and always return the same bounds. By the way,SetDiris called first before any otherDrivermethod so can be used for (lazy) initialization. -
Flushallows the driver to have internal buffers. In our case the buffer stores the entire display screen before save it to the file but in other cases it can be much smaller or nonexistent. -
Erris for signaling errors. For performance reasons there is no any internal error checking in pix. The driver is responsible to check errors as necessary and record the occurrence of the first error. It should avoid any actions that may cause further errors until the recorded error is cleared. The user can check for an error at his convenience using theArea.ErrorDisplay.Errfunctions.
For the sake of convenience w can also define a display constructor:
func NewDisplay(name string, width, height int) *pix.Display {
	driver := &Driver{
		Name:  name,
		Image: image.NewRGBA(image.Rect(0, 0, width, height)),
	}
	return pix.NewDisplay(driver)
}
It returns image.RGBA backed display with given dimensions, associated with the file with the given name.
Area.Draw
Let’s finally draw something.
func playerView(disp *pix.Display, artist, title string, cover image.Image) {
	a := disp.NewArea(disp.Bounds())
	a.Draw(a.Bounds(), cover, cover.Bounds().Min, nil, image.Point{}, draw.Src)
	disp.Flush()
}

func main() {
	disp := NewDisplay("/tmp/player.jpg", 640, 320)

	artist := "Gophers"
	title := "Work Hard Play Hard"
	cover := loadImage("testdata/gopherbug.jpg")
	playerView(disp, artist, title, cover)

	checkErr(disp.Err(true))
}
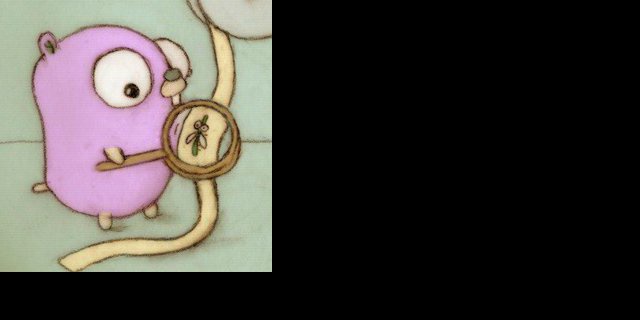
This isn’t exactly what we wanted but we’ll fix it in a moment.
The playerView function creates a new drawing area that covers the whole display screen. Next, it uses the Area.Draw function to draw the cover image in the selected area of the display.
Area.Draw works like draw.DrawMask with dst set to the whole drawing area. But what’s an Area?
Area gives you access to the rectangular portion of the display screen. One area, without additional synchronization, can be used by only one goroutine, but multiple goroutines can share a single display using multiple areas. Moreover, one area can span multiple displays.
Area isn’t a window as you’re used to in case of Windows or X11. Everything is drawn directly on the display and Area only limits the drawing area. Areas may overlap but their intersection will be affected by all of them.
loadImage is a helper function that loads an image from a file:
func loadImage(name string) image.Image {
	f, err := os.Open(name)
	checkErr(err)
	defer f.Close()
	img, _, err := image.Decode(f)
	checkErr(err)
	return img
}
Area.Fill
Let’s organize our screen a little bit. The space for the cover image will be on the left, centered vertically.
var bgColor = color.Gray{50}

func playerView(disp *pix.Display, artist, title string, cover image.Image) {
	r := disp.Bounds()
	a := disp.NewArea(r)
	a.SetColor(bgColor)
	a.Fill(a.Bounds())
	r.Max.X = r.Min.X + r.Dy()
	const margin = 20
	a.SetRect(r.Inset(margin))
	a.SetColorRGBA(0, 0, 200, 255)
	a.Fill(a.Bounds())
	disp.Flush()
}
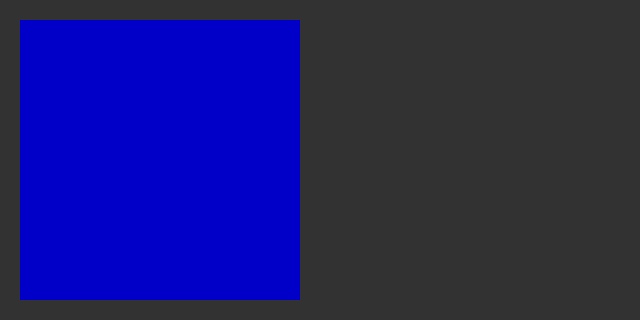
In the above code the a area initially covers the whole display. a.SetColor(bgColor) sets the color for the subsequent a.Fill(a.Bounds()) that fills the whole screen with it.
Next we do some calculations with r to reduce it to the square filling the left side of the screen. a.SetRect(r.Inset(margin)) reshapes our drawing area to be on the center of r with 20 point margins. Finally we fill the area with blue color to see if everything went as planned.
Let’s draw the cover image in the center of this area.
func playerView(disp *pix.Display, artist, title string, cover image.Image) {
	r := disp.Bounds()
	a := disp.NewArea(r)
	a.SetColor(bgColor)
	a.Fill(a.Bounds())
	r.Max.X = r.Min.X + r.Dy()
	const margin = 20
	a.SetRect(r.Inset(margin))
	sr := cover.Bounds()
	r = a.Bounds()
	r.Min = r.Size().Sub(sr.Size()).Div(2)
	a.Draw(r, cover, sr.Min, nil, image.Point{}, draw.Src)
	disp.Flush()
}
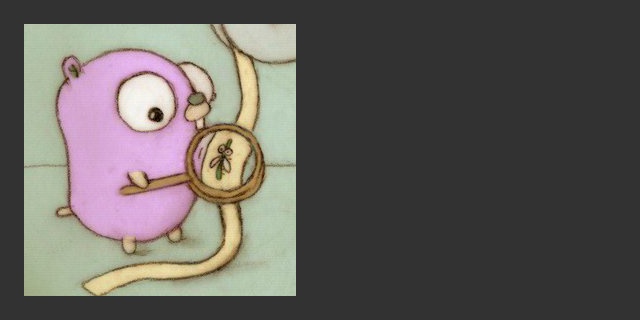
The magic r.Size().Sub(sr.Size()).Div(2) expression calculates the position for the top left corner of the cover image to place it in the center of the area. We use the “simplified” expression instead of r.Min.Add(r.Size().Sub(sr.Size()).Div(2)) because by default the area’s top left corner called origin is (0, 0).
Area has its own internal coordinate system independent of the other areas and the displays it covers. You can change the origin using the SetOrigin(p image.Point) method but usually you don’t want to do that because (0, 0) is nice and convenient.
Let’s see what happens when we double the size of the image.
cover = images.Magnify(cover, 2, 2, images.Bilinear)
Everything’s all right. It was supposed to be like that. The area has cropped the magnified image so we see only its central part.
TextWriter
Text is still the main way to communicate and present data. Sometimes the whole graphics library is used just to print text on a small monochrome OLED display, currently the cheapest way to display multilingual text messages.
Although drawing text in pix is really drawing multiple images on the same baseline, TextWriter is listed as one of the three main drawing primitives. This is because drawing text is a much broader concept than just drawing images. See the definition of TextWriter below:
type TextWriter struct {
	Area   *Area       // drawing area
	Face   font.Face   // source of glyphs
	Color  image.Image // glyph color (foreground image)
	Pos    image.Point // position of the next glyph
	Offset image.Point // offset from the Pos to the glyph origin
	Wrap   byte        // wrapping mode
	Break  byte        // line breaking mode
}
TextWriter combines drawing images with things like font, font face, drawing direction, wrapping mode and line breaking mode. Rendering text is a very broad topic and we don’t want to go over all these details here.
TextWriter uses the font.Face interface to convert individual unicode code points (runes) to their graphical representation (glyphs).
type Face interface {
	Size() (height, ascent int)
	Advance(r rune) int
	Glyph(r rune) (img image.Image, origin image.Point, advance int)
}
This simple approach turns out to be quite flexible and gives satisfactory results in most pix applications.
Glyphs are drawn side by side, always horizontally, from left to right. This doesn’t mean that you cannot draw lines of text in other directions but TextWriter alone cannot. You have to use the Area.SetMirror method to trick it.
Let’s print the name of the author and the song title on the right-hand side of the cover image.
The code of playerView function is getting long so from now I’ll only show the changes in this function with one line context.
a.Draw(r, cover, sr.Min, nil, image.Point{}, draw.Src)
// new code begin
r = disp.Bounds()
r.Min.X += r.Dy()
a.SetRect(r.Inset(margin))
w := a.NewTextWriter(titleFont)
w.SetColor(textColor)
w.WriteString(artist + " -- " + title)
// new code end
disp.Flush()
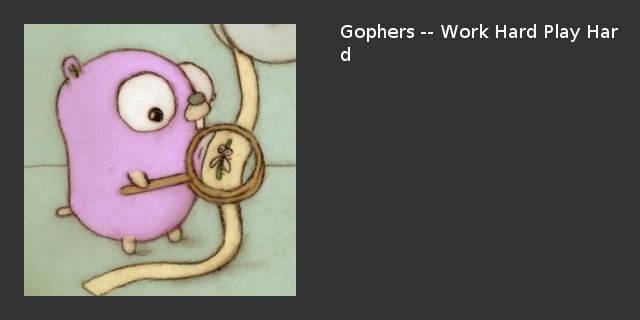
Hmm, the default line breaking mode doesn’t look very good for our use case. Let’s change it.
w := a.NewTextWriter(titleFont)
// new code begin
w.Break = pix.BreakSpace
// new code end
w.SetColor(textColor)
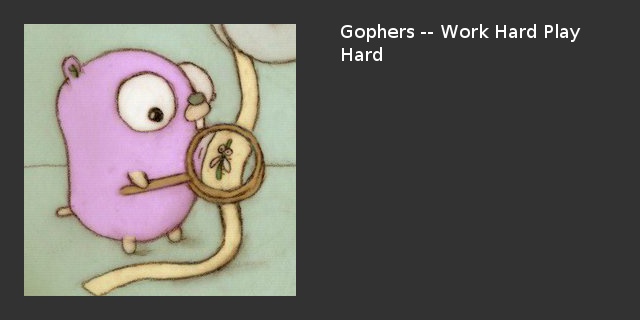
Much better.
I still have to explain where did titleFont come from. titleFont represents a font face, the specific size, style and weight of a font. In our case it’s the 18 point regular Dejavu Sans font. The necessary fonts can be loaded at run time from external source or included at compile time this way:
import "github.com/embeddedgo/display/font/subfont/font9/dejavusans18"

var titleFont = dejavusans18.NewFace(
	dejavusans18.X0020_007e, //  !"#$%&'()*+,-./0123456789:;<=>?@ABCDEFGHIJ
	dejavusans18.X0101_0201, // āĂ㥹ĆćĈĉĊċČčĎďĐđĒēĔĕĖėĘęĚěĜĝĞğĠġĢģĤĥĦħĨĩĪī
)
Embedding fonts into program code is a common practice in case of embedded systems. Such systems often have no external storage and a limited size of program memory. Fonts can be a large part of program image hence the concept of subfont taken straight from Plan 9. It allows you to select only the necessary components of the font. In our case, we included two 18 point subfonts for unicode code points from 0x020 to 0x201.
The above declaration using the NewFace function is a more convenient counterpart to the declaration below:
var titleFont =  &subfont.Face{
	Height: dejavusans18.Height,
	Ascent: dejavusans18.Ascent,
	Subfonts: []*subfont.Subfont{
		dejavusans18.X0020_007e,
		dejavusans18.X0101_0201,
	},
}
The subfont.Face type implements the font.Face interface. As you can see it’s defined by its height, ascent (height above the baseline) and the list of subfonts. Missing subfonts can be loaded at runtime if the (not shown) Loader field is set.
Much more could be written about fonts, subfonts, their storage, loading and rendering, but let’s go back to our music player example.
What will happen if the author/title text will be much longer? With the current size of the title area it can take up the entire half of the screen. Let’s reduce the height of the area to only two lines of text, and at the same time, let’s halve the spacing between the cover and title areas because currently it has a width of two margins.
a.Draw(r, cover, sr.Min, nil, image.Point{}, draw.Src)
// new code begin
height, _ := titleFont.Size()
r = disp.Bounds()
r.Min.X += r.Dy()
r.Max.X -= margin
r.Min.Y += margin
r.Max.Y = r.Min.Y + 2*height
a.SetRect(r)
a.SetColorRGBA(0, 0, 200, 255)
a.Fill(a.Bounds()) // temporary, to see the area
// new code end
w := a.NewTextWriter(titleFont)
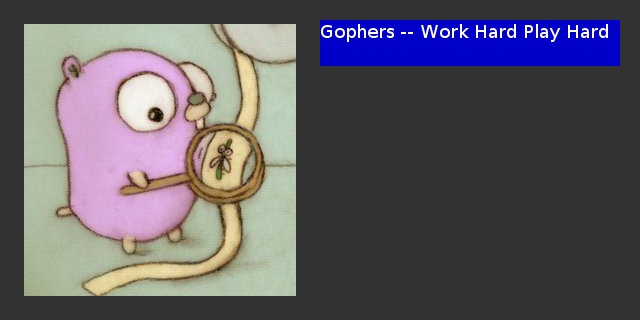
Now the layout looks fine.
One might want to center the text in the area but TextWriter won’t help us with that. Centering or right-justify operations are well defined only for the complete line of text. TextWriter is intended to be used as io.Writer or io.StringWriter so it’s inherently stream oriented, not line oriented. In this light even the BreakSpace mode fills somewhat stretched feature. Long story short, if you want to center the text you have to do it yourself and then StringWidth and Width functions will be helpful to you.
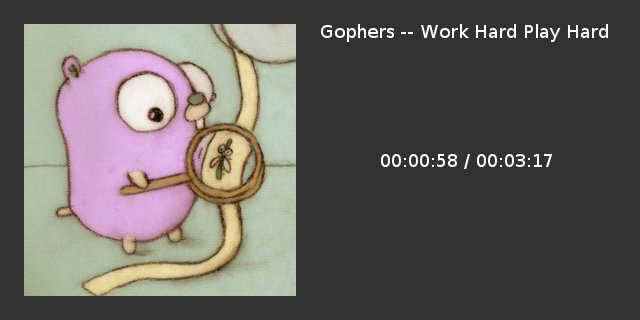
In addition to the author and the title of the song our player will also show the song duration and the current play time. The current time may be updated in real time by another (playing) goroutine. We can give it an area to work with and the goroutine may use the function below to periodically update the information.
func drawTimeDuration(a *pix.Area, t, duration int) {
	h, m, s := hms(t)
	str := fmt.Sprintf("%02d:%02d:%02d /", h, m, s)
	width := pix.StringWidth(str, titleFont)
	height, _ := titleFont.Size()
	a.SetColor(bgColor)
	r := a.Bounds()
	a.Fill(r)
	w := a.NewTextWriter(titleFont)
	w.SetColor(textColor)
	w.Pos.X = r.Min.X + r.Dx()/2 - width
	w.Pos.Y = r.Min.Y + (r.Dy()-height)/2
	w.WriteString(str)
	h, m, s = hms(duration)
	fmt.Fprintf(w, " %02d:%02d:%02d", h, m, s)
	a.Flush()
}
a.Flush() at the end of this function calls flush methods of all displays the area covers. Although Display.Flush is safe for concurrent use it can cause side effects in special cases like double buffering. There is no one-size-fits-all flush approach in case of full-frame buffering with multiple drawing goroutines. The “flush strategy” must be tailored to each specific case.
w.WriteString(artist + " -- " + title)
// new code begin
r = disp.Bounds()
r.Min.X += r.Dy()
r.Max.X -= margin
r.Min.Y = (r.Min.Y+r.Max.Y)/2 - 10
r.Max.Y = r.Min.Y + 20
drawTimeDuration(disp.NewArea(r), 58, 3*60+17)
// new code end
disp.Flush()
Buttons
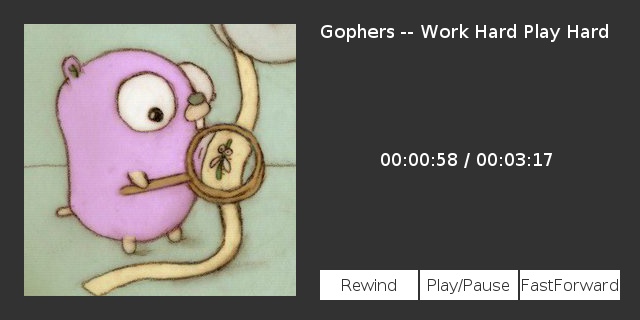
Even though pix doesn’t provide any Button function (after all, it’s not a GUI library) we definitely want some control buttons in our music player. The simplest possible button can be drawn using the function below:
func button(w *pix.TextWriter, r image.Rectangle, caption string) {
	w.Area.Fill(r)
	width := pix.StringWidth(caption, buttonFont)
	height, _ := buttonFont.Size()
	w.Pos.X = r.Min.X + (r.Dx()-width)/2
	w.Pos.Y = r.Min.Y + (r.Dy()-height)/2
	w.WriteString(caption)
}
As in the case of printing play time the control buttons will likely be handled by a separate goroutine. Our program isn’t a real music player so the function below only draws buttons in the provided area.
func drawControls(a *pix.Area) {
	a.SetColor(ctrlColor)
	w := a.NewTextWriter(buttonFont)
	w.SetColor(captionColor)
	r := a.Bounds()
	width := r.Dx() / 3
	r.Max.X = r.Min.X + width - 2
	button(w, r, "Rewind")
	r.Min.X = r.Max.X + 2
	r.Max.X = r.Min.X + width - 2
	button(w, r, "Play/Pause")
	r.Min.X = r.Max.X + 2
	r.Max.X = r.Min.X + width
	button(w, r, "FastForward")
	a.Flush()
}
Let’s draw the buttons at the bottom right of our view.
drawTimeDuration(disp.NewArea(r), 58, 3*60+17)
// new code begin
r = disp.Bounds()
r.Min.X += r.Dy()
r.Max.X -= margin
r.Max.Y -= margin
r.Min.Y = r.Max.Y - 30
drawControls(disp.NewArea(r))
// new code end
disp.Flush()
We can finally see our music player in all its glory.
Other drawing functions
As you can see, it’s possible to create a pretty decent looking user interface by using only three basic drawing primitives. But pix give us six more ones. Let’s take a look at each of them.
Area.Point
Point is like Go i++. It’s redundant but convenient. You can always replace Point(x, y) with Fill(image.Rect(x, y, x+1, y+1)) but in applications where Point is useful, using Fill doesn’t look very legible.
Area.Line
Line simply draws a straight line connecting two points.
Area.RoundRect
RoundRect is a swiss army knife function. It can draw rectangles, circles and ellipses or a combination of them, either filled or unfilled. Drawing performance is almost the same as with multiple specialized functions.
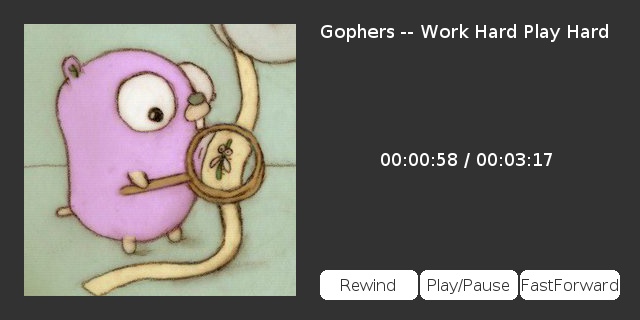
We can use RoundRect to round the corners of the buttons in our example.
func button(w *pix.TextWriter, r image.Rectangle, caption string) {
	r = r.Inset(7)
	r.Max.X--
	r.Max.Y--
	w.Area.RoundRect(r.Min, r.Max, 7, 7, true)
	width := pix.StringWidth(caption, buttonFont)
	height, _ := buttonFont.Size()
	w.Pos.X = r.Min.X + (r.Dx()-width)/2
	w.Pos.Y = r.Min.Y + (r.Dy()-height)/2
	w.WriteString(caption)
}
Area.Quad
Quad draws a convex quadrilateral or a triangle described by the given vertices, either filled or unfilled. It draws a triangle if two adjacent vertices are identical.
Drawing a quadrilateral is almost as fast as drawing a triangle and much faster than drawing a quadrilateral using two triangles. The quadrilaterals are also more versatile and in many cases more convenient to use than triangles.
Let’s modify the buttons even more and replace the text with graphic symbols.
func gbutton(a *pix.Area, r image.Rectangle, caption [][4]image.Point) {
	r = r.Inset(7)
	r.Max.X--
	r.Max.Y--
	a.SetColor(ctrlColor)
	a.RoundRect(r.Min, r.Max, 7, 7, true)
	p := r.Min.Add(r.Max).Div(2)
	a.SetColor(captionColor)
	for _, q := range caption {
		a.Quad(q[0].Add(p), q[1].Add(p), q[2].Add(p), q[3].Add(p), true)
	}
}

var rewind = [][4]image.Point{
	{{15, -7}, {15, -7}, {1, 0}, {15, 7}},
	{{-5, -7}, {-5, -7}, {-19, 0}, {-5, 7}},
}
var playPause = [][4]image.Point{
	{{-15, -7}, {-15, -7}, {-1, 0}, {-15, 7}},
	{{6, -7}, {9, -7}, {9, 7}, {6, 7}},
	{{14, -7}, {17, -7}, {17, 7}, {14, 7}},
}
var fastForward = [][4]image.Point{
	{{-15, -7}, {-15, -7}, {-1, 0}, {-15, 7}},
	{{5, -7}, {5, -7}, {19, 0}, {5, 7}},
}

func drawControls(a *pix.Area) {
	r := a.Bounds()
	width := r.Dx() / 3
	r.Max.X = r.Min.X + width - 3
	gbutton(a, r, rewind)
	r.Min.X = r.Max.X + 3
	r.Max.X = r.Min.X + width - 3
	gbutton(a, r, playPause)
	r.Min.X = r.Max.X + 3
	r.Max.X = r.Min.X + width
	gbutton(a, r, fastForward)
	a.Flush()
}
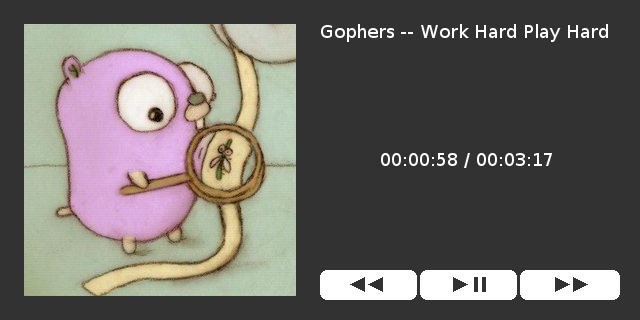
The buttons drawn in this way don’t look the best mainly because of the flat appearance and lack of anti-aliasing. Image based buttons would look much better.
Area.FillQuad
FillQuad draws a filled convex quadrilateral or triangle. The difference to Quad is that FillQuad obeys the filling rules so it can be used to draw filled polygons composed of adjacent quadrilaterals and triangles, ensuring that the common edges are drawn once. In this regard, it’s somehow similar to the Fill function which fills a rectangle defined as inclusive at the top-left and exclusive at the bottom-right.
Area.Arc
Arc is the last function left to describe. It’s most complex one but very useful to present data.
The most obvious use case is a Pie Chart. Let’s create one for 15%, 25%, 60% data.
disp := newDisplay(640, 320)
a := disp.NewArea(disp.Bounds())
p := a.Bounds().Max.Div(2)

var alpha int64

alpha = math2d.FullAngle * 15 / 100 // angle corresponding to 15%
th0 := -math2d.RightAngle / 3       // start angle of the first piece (any)
th1 := th0 + int32(alpha)           // end angle of the first piece
a.SetColorRGBA(200, 0, 0, 200)
a.Arc(p, 0, 0, 150, 150, th0, th1, true)

alpha = math2d.FullAngle * 25 / 100 // angle corresponding to 25%
th0 = th1                           // start angle of the second piece
th1 = th0 + int32(alpha)            // end angle of the second piece
a.SetColorRGBA(0, 200, 0, 200)
a.Arc(p, 0, 0, 150, 150, th0, th1, true)

alpha = math2d.FullAngle * 60 / 100 // angle corresponding to 60%
th0 = th1
th1 = th0 + int32(alpha)
a.SetColorRGBA(0, 0, 200, 200)
a.Arc(p, 0, 0, 150, 150, th0, th1, true)
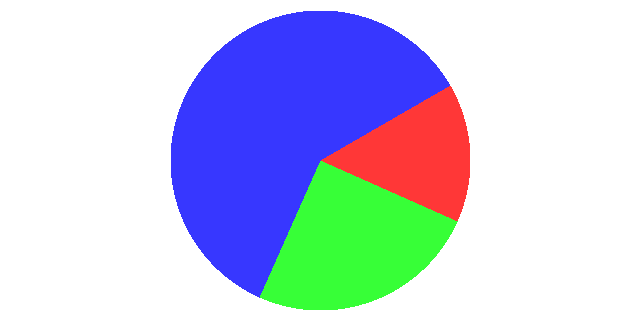
Arc draws an arc starting at angle th0 and ending at, but not including, th1. Such one-side inclusiveness ensures that the adjacent edges of our pie chart are drawn once. The colors with alpha=200 allow us to confirm this easily.
In pix and math2d packages the angles are of type int32 which can represent angles from -FullAngle/2 to FullAngle/2 - 1 (inclusive). The angle unit is equal to 1/4294967296 of the full angle.
Two well known angles are declared in math2d this way:
const (
	FullAngle        = 1 << 32       // 2π rad = 360°
	RightAngle int32 = FullAngle / 4 // π/2 rad = 90°
)
As you can see, FullAngle and even FullAngle/2 doesn’t fit in int32. As the full range of int32 is used to represent angles from -180° to 180° the calculations on angles aren’t obvious:
theta := math2d.RightAngle
fmt.Println(theta * 4) // prints 0
The compiler will warn you on problematic constant angles but the correctness of the calculations on the angle variables is up to you. For example, computing the mean of two angles (th0 + th1) / 2 may give unexpected result. If you don’t feel confident you can use int64 for calculations which may help a bit.
Let’s go back to our examples. Sometimes slightly spaced pieces of a pie chart look better. We can move them around 10 points from the center by replacing
a.Arc(p, 0, 0, 150, 150, th0, th1, true)
with the code below
o0 := image.Pt(10, 0)
o := math2d.Rotate(o0, th0+int32(alpha/2))
a.Arc(p.Add(o), 0, 0, 150, 150, th0, th1, true)
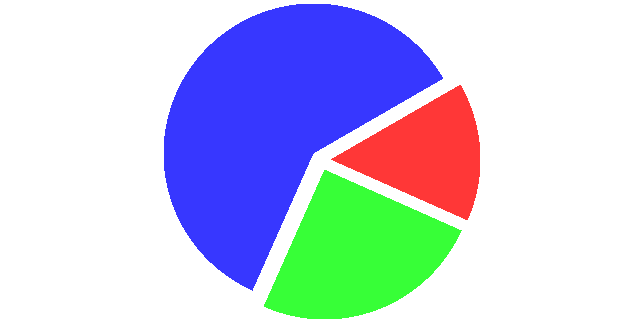
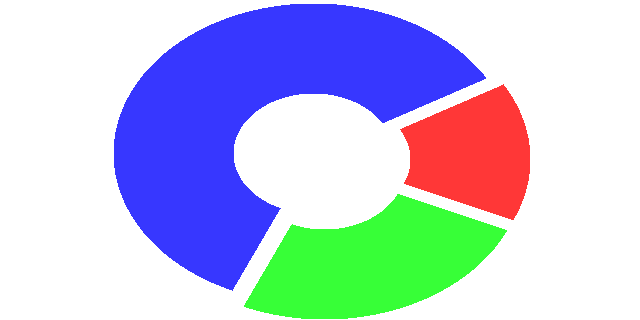
By replacing
a.Arc(p.Add(o), 0, 0, 150, 150, th0, th1, true)
with
a.Arc(p.Add(o), 80, 60, 200, 150, th0, th1, true)
we get an interesting looking elliptical pie chart with the center part cut out.
Let’s make the last change to our music player example. Let’s use the Arc function to present the current playback position graphically.
func printTime(w *pix.TextWriter, t int) {
	h, m, s := hms(t)
	str := fmt.Sprintf("%02d:%02d:%02d", h, m, s)
	width := pix.StringWidth(str, titleFont)
	w.Pos.X -= width / 2
	w.WriteString(str)
}

func drawTimeDuration(a *pix.Area, t, duration int) {
	r := a.Bounds()
	a.SetColor(bgColor)
	a.Fill(r)

	p := r.Min.Add(r.Max).Div(2)
	rmax := min(r.Dx(), r.Dy()) / 2
	rmin := rmax - 20
	th0 := math2d.RightAngle + math2d.RightAngle/3
	th1 := math2d.RightAngle - math2d.RightAngle/3
	a.SetColor(ctrlColor)
	a.Arc(p, rmin, rmin, rmax, rmax, th0, th1, false)
	if t > 0 {
		alpha := int64(math2d.FullAngle*5/6) * int64(t) / int64(duration)
		a.Arc(p, rmin, rmin, rmax, rmax, th0, th0+int32(alpha), true)
	}

	w := a.NewTextWriter(titleFont)
	w.SetColor(textColor)
	height, _ := titleFont.Size()

	w.Pos.X = p.X
	w.Pos.Y = p.Y/2 - height/2
	printTime(w, t)

	w.Pos.X = p.X
	w.Pos.Y += p.Y
	printTime(w, duration)

	// play button
	p0 := image.Pt(-14, -14).Add(p)
	p1 := image.Pt(14, 0).Add(p)
	p2 := image.Pt(-14, 14).Add(p)
	a.Quad(p0, p0, p1, p2, true)

	a.Flush()
}
The playerView function also requires some changes:
w.WriteString(artist + " -- " + title)
// new code begin
r.Min.Y = r.Max.Y + margin/2
r.Max.Y = disp.Bounds().Max.Y - margin/2
drawTimeDuration(disp.NewArea(r), 58, 3*60+17)
// new code end
disp.Flush()
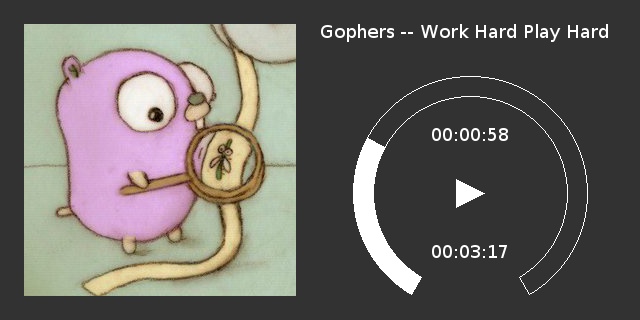
We’ve reduced the number of buttons to just one. The function of the FastForward and Rewind buttons can be replaced by the playback position indicator.
This is where we end the first part of the article about the pix library. In the second part, we’ll get our hands dirty with some real hardware.
Michał Derkacz